Friday, September 30, 2011

Recipe Swap ~ Mini Apple Pies

Before you say, "wait, didn't Lish make apple pie recently?" (Yes, yes, I did)... this is from my most recent recipe swap from my national cooking board. This is Maryanna's (Crafty Baker) recipe for Mini Apple Pies. I had planned on making apple turnovers or tarts anyway so this was a welcome trade! 

I did tweak it a tiny bit, only because I think nutmeg definitely adds a little punch to apple & as for lemon, I ALWAYS use lemon. It brightens the flavor of everything! This recipe is an adorable, fast & easy way to get apple pie on the table on a week night. Because I had just made the whole "she-bang", I stayed with the original recipe's requirement of a pre-made pie crust. It made things very, very easy for this tired working mom! I also used my muffin top tin because I thought they'd be cute little pies that way & wouldn't need the water addition. I also had a rather large honeycrisp apple ~ my favorite baking variety! 


Mini Apple Pies
adapted from "Taste & See"

  • 1 large honeycrisp apple, 
  • peeled, cored & thinly sliced
  • juice & zest of 1 lemon
  • 1/4 cup sugar
  • 2 tsp all-purpose flour
  • 1/2 tsp ground cinnamon
  • 1/4 tsp fresh ground nutmeg
  • 1 sheet refrigerated pie crust (1/2 box)

Preheat oven to 425. 
In a medium bowl, combine apples, lemon juice & zest, sugar, flour, cinnamon & nutmeg. Toss gently then set aside.

Open and unroll pie crust flat onto work surface. Using a 3"-wide biscuit cutter, cut our six circles, reserving scraps. Press each circle inside 6 spaces of the muffin top tin.

Evenly divide apple mixture into each prepared muffin cup. Cut reserved dough scraps into strips 1/4-inch wide ~or~ into little cookie cutter shapes (I made leaves & acorns). Top each pie with strips in a basket weave pattern or with the cut shapes. 

Bake until the crust is browned, about 18-20 minutes. Let pies cool in muffin tin, then remove.

Thank you, Maryanna for a very simple & delicious dessert! I shared it with my in-laws too!
<3 Lishie
PS~ I will announce the winner of the Giveaway come tomorrow's post! Good Luck! :)


PSS~Come to the NYU Bookstore, 726 Broadway, NYC, NY 10003 on 10/6/11 @11a.m. for a free reading of Llama Llama Red Pajama to help break Jumpstart's Read for the Record

Wednesday, September 28, 2011

Stuffed Shells

One of my favorite, favorite, favorite Italian pasta dishes is stuffed shells. They're adorable little packages of goodness~ cheesie goodness. I'm not sure why I do not make them more often but when I do I am so happy. And I like to stick to traditional cheese, only because that makes me happy too.

And I am jumping for joy because the tiny basil seeds my tot & I planted in April? Well, it sprouted so big, I will have fresh basil all winter long. Hmmm, maybe my thumb is a teeny bit green, hmmm  :) Or Gabriel's is, more like it!


Stuffed Shells
  • 1 package of x-large Shell Pasta
  • 1 (16-ounce) container ricotta cheese (I used Skim, cannot tell the difference here)
  • 2 cups shredded mozzarella cheese, divided
  • 1 egg, whisked
  • ½ cup grated Parmesan cheese
  • 1 tsp fresh basil, chiffonade
  • S & P
  • 3+ cups Tomato Sauce

Cook the pasta shells just pre-al dente. (The shells will finish cooking later in the oven & you do not want mush!) Cool off the pasta so that you can pick each up by hand. (Really, listen to me here- it is hot!!! Take it from someone who yelled ouch a couple of times tonight.)

Mix 1 cup mozzarella & the other 2 cheeses, egg, basil & S&P together in a medium bowl. Preheat the oven to 375.

Spray a rectangular 13X9" baking dish with olive oil spray.

Evenly layer the bottom of the baking dish with one cup of the sauce. Then, one-by-one, take a cooled & cooked shell carefully in one hand &

using a small spoon, spoon the cheese mixture into the shell, then place the filled pasta into the sauce. Continue with all of the shells, lining them side-by-side.
Cover all of the stuffed shells with the remaining 2 cups of prepared sauce. Sprinkle the 2nd cup of shredded mozzarella evenly over the prepped shells.

Bake for 30 minutes until the cheese is browned & sauce is bubbling. Serve topped with some fresh basil & grated parmesan.

Mangia & enjoy &...

<3 Lishie

Come to the NYU Bookstore, 726 Broadway, NYC, NY 10003 on 10/6/11 @11a.m. for a free reading of Llama Llama Red Pajama to help break Jumpstart's Read for the Record

Tuesday, September 27, 2011

Giveaway!!!

So DeLish has over 125 fans on Facebook!!! Woohoo!!!!!!!!!!!! I thought it was high~time for a giveaway. 

Do you love The Pioneer Woman like I do? Well, here's your chance to win her novel, "Black Heels in Tractor Wheels: A Love Story" in Hard Cover. 

"New York Times"-bestselling author and accidental ranch wife Drummond shares her real-life storybook romance, set on a historic Oklahoma cattle ranch.

To win: 
 ~Leave a comment on this post (let me know your favorite Pioneer Woman Recipe!!!)


You have until midnight, Thursday, 9/29/11. Winner will be chosen at Random & announced on Friday, 9/30/11.  Good luck!

Please remember to leave your email address so I can contact you!!!

Meanwhile, here's a yummy DeLish snack recipe to tide you over: Citrus Biscotti.

Sick back & have it with a cuppa Earl Grey! Now all you need is a good book :)

Monday, September 26, 2011

Sweet Potato Ravioli with Brown Butter

 I love wonton wrappers. They are so versatile, from dumplings to spring rolls to wonton soup... to dessert. It's fresh pasta ready for you to whip up something good... And oh.my.goodness these were delicious. So dainty & so filling. A teensy bit time consuming but once you get into a rhythm of creating the ravs, it is done in a flash! YUM.
Sweet potatoes & Fall... a great pairing!

Sweet Potato Ravioli with Basil Brown Butter
  • 1-2 large sweet potatoes
  • 1/4 teaspoon ground cinnamon
  • pinch of ground nutmeg
  • 1 TBSp fresh basil, chiffonade
  • 24 wonton wrappers
  • S & P
  • 3 tablespoons butter
Decide how you want to make the sweet potatoes- bake, microwave, boil or steam?:

~If baking, wash the skins, then wrap in aluminum foil. Bake at 400 degrees until soft inside. If microwaving, poke holes in the potato with a fork, then place microwave on baked potato setting. Both ways, after cooked, scoop out the cooked potato from the skins into a bowl.

~If boiling or steaming, clean & peel the potatoes & chop into even 2" pieces. Add salt to the water if boiling & cook till soft enough that a butter knife slips out. Steam for the safe amount of time. Mash the cooked potato in a bowl with a fork or masher.

Add the cinnamon, nutmeg & basil to the potato mash. Combine with a fork.

Take two wonton wrappers... Place one down & add a tablespoon of potato mixture. Dip your finger in water & using that finger, trace around the tablespoonful of potato on the wonton. Place a second wonton wrapper on top & gently seal by pressing your finger all along the outside. Continue to make all of the ravioli this way.

Meanwhile, set a roomy post of 6 quarts of water to boil. Once water is boiling add ravioli to the pot for 2 minutes each wrapper, adding & taking them out with a slotted spoon or "spider".

In a separate sauce pan, on medium-low, heat the butter gently until it turns a golden brown. Do not allow to burn! 

Pour butter over cooked ravioli. Garnish with basil leaves. 
Enjoy!
<3 Lishie


PS- STAY TUNED FOR A GIVEAWAY TOMORROW!!!

Friday, September 23, 2011

RECIPE SWAP ~ Tailgating

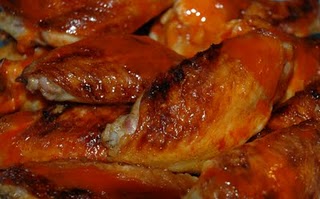
Perhaps you have heard of my hubby's Buffalo Wings, "Wingsday" saga? My hubby LOVES his wings & has them every.single.Wednesday. BUT, his triglycerides were really high so we had to figure something out, something different from the usual fried wings. I have tried Buffalo Chicken fries & broiling them & Baking them &, finally, he has settled on grilling them. And the meaning of "them" now equates to skinless, boneless chicken breast. I mean, I've even made Buffalo Chicken Stromboli. So when I received my appetizer recipe from my most recent swap for Baked Buffalo Wings from Melissa (melbride2005) at I was Born to Cook, I smiled & laughed! My hubby would definitely eat them- his game of choice being a boxing match (Go Ortiz!)

Baked Buffalo Wings
from Allrecipes
  • 3/4 cup all-purpose flour
  • 1/2 teaspoon cayenne pepper
  • 1/2 teaspoon garlic powder
  • 1/2 teaspoon salt
  • 20 chicken wings
  • 1/2 cup melted butter
  • 1/2 cup hot pepper sauce

  • Line a baking sheet with aluminum foil, and lightly grease with cooking spray. Place flour, cayenne pepper, garlic powder, and salt into a resealable plastic bag.  Shake to mix. 

  • Add the chicken wings, seal, and toss until well coated with flour mixture. Place the wings onto the prepared baking sheet and refrigerate at least 1 hour.

  • Preheat oven to 400 degrees.  Whisk together the melted butter and hot sauce in a small bowl. Dip wings into butter mixture, and place back on baking sheet. Bake until chicken is no longer pink in the center, and crispy on the outside, about 45 minutes. Turn the wings over halfway during cooking so they cook evenly.
  •  
  • The verdict? The cayenne pepper & garlic powder added a little something extra & he was happy to have actual wings as a treat, but, alas, he enjoys the fried or grilled variety best. 
    I definitely suggest making these for your next game, sporting event! Hubby said they were tasty!
    <3 Lishie

Thursday, September 22, 2011

Llama Llama Red Pajama


On October 6th, 2011 I will be reading "Llama Llama Red Pajama". Will you?!

Millions of children in low-income neighborhoods are at risk of school failure before they even start kindergarten. Jumpstart's Read for the Record®, presented in partnership with the Pearson Foundation, allows Americans to demand that all children receive the quality early education they deserve.
On October 6, 2011, more than 2 million voices will call for an end to America's early education achievement gap by reading Llama Llama Red Pajama by Anna Dewdney – setting a world record in the process! Sit down to read in your community.You'll be standing up for children everywhere! 


Pledge to help break the record:


I will be reading it to local children in the Children's Section of NYU Bookstore, for the local Greenwich Village Community, New York City. Come on by!!!
AND I will be reading it to my tot, Gabriel at home.

A great snack to go along with a story! Llamas are herbivores
A herbivore is an animal that gets its energy from eating plants, and only plants. 

Banana Cookies for Gabriel
1 cup + 2 TBsp a-p flour (wheat flour would work just fine!)
1/2 tsp baking soda
1/4 tsp salt
1/4 cup butter 
2 ripe, mashed bananas
1/4 cup apple cider
1 egg
1 tsp vanilla

Preheat oven to 375 degrees.

Sift together (over medium bowl) flour, baking soda & salt. Beat the butter until creamy & add bananas, beat until mixed smoothly together. Add cider, egg, & vanilla until mixed in. Slowly add the flour mixture & blend together.

Drop dough 2" apart (I use a melon baller) onto cookie sheet (I use parchment paper.) Bake at 375 degrees for 8 minutes or until "set".  Remove from heat & cool on a cookie rack. Makes 2 dozen cookies.

These taste like banana bread in a cookie! The consistency is more like a bread than a cookie too. It just has that cookie shape that kids love!

Wednesday, September 21, 2011

Fried Rice

You may or may not know that I am extremely allergic to shellfish which makes me infinitely sad because I use to love to cook it & eat shrimp. Seems the iodine reaction built up in my system from a small allergy to anaphylactic proportions.And also, because it extremely limits my eating out choices! Good thing I can cook.

One thing I miss enormously is Chinese Takeaway. I can't trust that I'll be safe from an allergic reaction because often the same woks & oil is used to prepare cross-over foods. So better safe than sorry! I was really wanting veggie fried rice last night. This is a very simple fried rice but it came out so tasty. I think it because of 1) the cooking temp was perfect in my wok, 2) the rice was right & 3) garden-FRESH peas. The peas I used were home grown at the farm this past weekend.

The key with cooking food in a high temperature on the stove top is to have every ingredient prepped & ready & close at hand!!!

Veggie Fried Rice
  • 2-3 TBSp Canola Oil
  • 2 cups cooked, short-grain rice (I use arborio) 
  • 3 TBSp Low Sodium Soy Sauce
  • 2 scallions, sliced thinly- white & green
  • 1 egg, whisked/scrambled
  • 1/4 cup fresh peas
Heat the canola oil in a wok on HIGH heat on the stove. A wok is the best pan to use but if you do not have one, use your deepest saute pan. When you are sure the oil is sizzling hot, add the rice. Drizzle the soy sauce over the rice. Quickly, with a wooden spoon, stir, stir, stir!!! Create an empty circular space in the middle of the work, shifting the rice to the sides... add the scallions & stir... add the egg... scramble, scramble, scramble... constantly stirring... then mix all of the ingredients together stirring all the while. Add the peas, stir/cook a minute more & serve!

I love to also add tofu (before the egg) & water chestnuts, carrots (cubed in tiny pieces)...


Enjoy!
<3 Lishie

Tuesday, September 20, 2011

Apple Pie

Ooey~gooey~ness!
I really have to say there's no comparison between orchard grown & store bought apples. The variety along says so much but the lack of waxy layer on the skin says it all to me. I chose gorgeous, plump Honeycrisp apples last week at the farm to bake with & I chose well. "Apple" scientists at the University of Minnesota discovered Honeycrisp by cross-pollinating two exceptional apple varieties, Macoun & Honeygold. These apples are perfect for baking & are at their prime now. The fruit was so ig, I only needed 3 LARGE honeycrisp apples to create this pie! And they are very crisp, tart & sweet, not to mention juicy. The texture holds its shape, crunch & firmness well.

I shared this pie with my inlaws & my pop-in-law had seconds (he never does on sweets!) That says a lot :)  Now what to do with the rest of my picking spoils??? Hmmm...

The following is the pie recipe I have been using since I was a little girl. I love that red & white checked cookbook :)!

Apple Pie
~Adapted from Better Homes & Gardens
  • 6 cups thinly sliced peeled tart apples
  • 1-2 TBSp lemon juice & lemon zest
  • 3/4 cup granulated sugar
  • 2 TBSp all-purpose flour
  • 1/2 teaspoon ground cinnamon
  • 1/4 teaspoon fresh ground nutmeg
  • 1 recipe Pastry for Double-Crust Pie (see below)
  • 1 TBSp butter
1. In a large mixing bowl toss apple slices with lemon juice & zest. Combine granulated sugar, flour, cinnamon, & nutmeg. Add to apples and toss until apples are coated. Set apple mixture aside.
2. Prepare Pastry for Double-Crust Pie. Divide dough in half. Form each half into a ball. On a lightly floured surface, roll out 1 ball of dough into a 12-inch circle. Ease pastry into a 9-inch pie plate.
3. Transfer apple mixture to pastry-lined pie plate. Dot with butter. Trim pastry even with pie plate. 

For top crust, roll out remaining dough. Here is where I have fun with it!!! You can so it the regular way:
Cut slits in top crust. Place top crust on the filling. Seal and flute the edge. 
Oven ready!!!
 ~Or~
You can do it the Lishie way! I roll our the 2nd crust & use a cookie cutter. For Fall apple pie I use leaves (for a summer pie, butterflies, etc., etc.) Then I place the cookie shapes along the entire top of the pie, on the apple filling in a lattice-like way. It makes for a beautiful presentation!
Brush the top with water & lightly sprinkle with sugar. 

4. To prevent overbrowning, cover the edge of the pie with foil. Bake in a 375 degree F oven for 25 minutes. Remove foil; bake for 20 to 25 minutes more or until the top is golden brown and apples are tender. 

Makes 6 to 8 servings.
Pastry for Double-Crust Pie: Stir together 2 1/4 cups all-purpose flour and 3/4 teaspoon salt. Using a pastry blender, cut in 2/3 cup shortening until pieces are pea size. Sprinkle 1 tablespoon cold water over part of the mixture; gently toss with a fork. Push moistened dough to the side of the bowl. Repeat, using 1 tablespoon cold water at a time, until all the dough is moistened (6 to 8 tablespoons water total).

Enjoy! Happy almost~autumn!
<3 Lishie
A star pie :)

Monday, September 19, 2011

Family Days

Gabriel & mommy
September means apple picking for the "D" family! We venture out to a NJ farm, where there's not only apple trees but other farm grown treasures & activities. Gabriel delighted in a pony ride & we had fun together on the tractor wagon ride! Gabriel loved the animals at the petting pen too. 

I had to have a fresh baked apple cider doughnut... & I tried homemade strawberry wine! It was delish. Hubby & I chose some beautiful farm grown bounty that I will be making dinners & desserts with this week.

How do you as a family celebrate local produce & places?

<3 Lishie

*Lishie tip- A great craft for the tots is to have them help choose their veggies, then later draw them!

Friday, September 16, 2011

Key Mistake?

There are quite a few food creations that began as "accidents"... Take chocolate chip cookies, Wheaties, sandwiches, potato chips & ice cream cones. When I mistakenly came home from the grocery with sweetened evaporated milk instead of sweetened condensed milk I was upset. I rarely do something like this & I was rearing to make my hubby his favorite key lime pie . So when he suggested trying it anyway, using the evaporated milk instead, I decided to go ahead & do it. What I created wasn't a magnificent culinary creation but he enjoyed it nonetheless. According to hubby the texture was different, more cake-like, less creamy, & the flavor not as intense. But he enjoyed it!!!


Key Lime Mistake Cake-Pie
Adapted from Nelly & Joe's

  • 9" graham cracker pie crust
  • 14 oz. can of sweetened evaporated milk
  • 3 egg yolks (whites not used)
  • ½ cup Nellie & Joe's Key West Lime Juice
Combine milk, egg yolks and lime juice. Blend until smooth. Pour filling into pie crust and bake at 350º for 35 minutes. Allow to stand 10 minutes before refrigerating. Just before serving, top with freshly whipped cream, or meringue, and garnish with lime slices. 


Enjoy!
<3 Lishie

Caramel Blondies

Crisp & crunchy caramel top coating
Would anybody like some Caramel Blondies? I know my fellow work peops will appreciate 'em! :)


Caramel Blondies
  • 1 1/2 sticks unsalted butter
  • 1 1/2 cups all-purpose flour
  • 1 tsp baking powder
  • 1/2 tsp salt
  • 3/4 cup light brown sugar
  • 3/4 cup dark brown sugar
  • 2 large eggs
  • 1/2 teaspoons vanilla extract
  • 3/4 cup milk chocolate chips
  • 3/4 cup white chocolate chips
  • 1/4 cup caramel sauce
Yumtastic middle
Preheat oven to 350°.

Butter and line a 9x9" baking pan with parchment paper. Butter the parchment paper too. Combine the flour, baking powder & salt in a medium bowl.

Melt the butter; add brown sugars & combine until sugar is melted in. Let the mix cool. Then whisk in the eggs & vanilla until combined. Blend in the flour mixture just until it's combined. Fold in the chips.

Scoop the batter into the prepped pan. Flatten/even out the top, then drizzle the caramel all over the batter. Take a spatula & lightly swirl the caramel into the top. 

Bake for about 25-30 minutes (until a toothpick comes out clean).

Makes 16.

Lishie-tip- Leave about a TBsp of the flour mixture in it's original bowl & mix in the chips with it. This little bit of flour will help the chips not settle into the bottom of the pan.

Also- I mix everything in a batter bowl then pour it into the prepped pan, instead of scooping!

Enjoy!!!
<3 Lishie

Wednesday, September 14, 2011

Lemon~Rosemary~Garlic Smashed New Potatoes

Are you ever just in the mood for a certain food or flavor combination? That is how I felt tonight. I wanted lemon~rosemary... My hubby was grilling sirloin steak, I had a mushroom salad already prepped... & beautiful new potatoes. Hmmmm what to do? Aha!:


Lemon~Rosemary~Garlic Smashed New Potatoes

  • 1 lb. new potatoes, washed & cleaned
  • 4 garlic cloves, whole, peeled & smashed
  • 2 TBSp extra virgin Olive Oil
  • 1 TBSp Lemon Juice
  • 1/4 tsp Lemon Zest
  • 1/4 tsp Kosher Salt
  • 1/4 tsp pepper
  • 1 & 1/2 tsp dried Rosemary (or 1 tsp fresh, chopped small)

Place the potatoes, skins on, in a small pot along with the garlic cloves. Add water until the potatoes are immersed. Turn the stove  on high & bring to a boil. 


Meanwhile whisk together the olive oil, lemon juice & zest, s & p, & rosemary.


After the little spuds have been boiling for about 25 minutes (stick a butter knife in- if the potato falls off with little or no resistance, the potatoes are done! Better to have a little resistance because the spuds will continue cooking in the hot water.) Drain the water & place the potatoes & garlic cloves together in a mixing bowl. Using the back of a large spoon, "smash" each potato & garlic clove, leaving nice, large lumps. Drizzle the lemon oil dressing over all of the smash & toss with the spoon. 


Enjoy!
<3 Lishie

Tuesday, September 13, 2011

I'm Steaming!

I've said it before, it is a fact... it is difficult being a full-time, commuting from NJ-NYC, working mom & coming home to put dinner on the table. However, with organization & prep (& some fun cook with your child(ren) games) I manage to do it. And you can too! 

I treasure my Sundays. Church, some outside time (usually a beautiful, long walk), grocery shopping with my hubby, then prep, prep, prep! I organize my cooking schedule for the week, get my coupons together & create a shopping list & head to the store. Of course, sometimes the list changes. If there's a particularly gorgeous veg I had not thought to buy or some other inspiration catches, but for the most part, it is planned.

When we get home, I organize the food & prep it. A huge part of this is steaming vegetables for the week! There are so many amazing meals that can be made or enhanced with steamed veg!!! And it keeps the color* & the nutrients packed in!!! (*Just don't forget to give the finished veg an ice bath at the end to stop the cooking process & shock in the color, flavor & nutritional value! )Some ideas are quiches & omelets, stir fries & pastas, couscous, rices & risottos... Or just as a dipping snack! My tot Gabriel would eat veggies by the ton if I let him. 
And the beauty of it is, you DON'T have to add them to anything. The vegetable, with its natural delicious flavor stands on its own as a side. (Look at those gorgeous asparagus I made... Simply Spritz with lemon & serve!) 

You can use a regular steamer on top of boiling water or, like me, a rice-maker/steamer. And many times I'll make rice at the same time. Ohhhhhhhhhhhhh RICE!

I made a HUGE discovery last week! Use equal parts water & arborio rice (you know, the kind you use for risotto?) in the rice-maker. Stir halfway (a no-no with regular grain rice) & add some more water allow to cook out, stir again... and you get= Perfect.sticky.rice.  

<3 Lishie
*Lishie tip- For greens, I add sliced lemon WHILE the veg is steaming... it lends a subtle layer to the taste.

Monday, September 12, 2011

Salted Caramel Hot Cocoa

So today was the Tenth Anniversary of 9/11... I remember every moment of that day... It's still so vivid. I choose to remember in a quiet reflection with my family because the sadness is so real & frightening. The angst & anxiety are very much heightened this year. I needed something comforting at the end of the day... 


I love the combination of Salt & caramel & chocolate so much (watch for another DeLish original cookie bar soon of this combo!)
I also love the Salted Caramel Hot Chocolate at Starbucks. I attempted to replicate it at home. I used a basic hot cocoa recipe then added some caramel ice cream topper & sea salt. YUMmmmm...


Salted Caramel Hot Cocoa
(makes 1 Mug-full)

  • 2 TBSp Sugar
  • 1 TBSp Cocoa
  • 1/4 tsp Vanilla
  • 1 cup Milk
  • 2 TBSp Caramel Sauce, divided
  • 1/8 tsp Sea Salt


Mix the sugar & cocoa in a bowl.  Add the vanilla & mix well. Add 1 TBSp of the caramel sauce.

Meanwhile, slowly heat the cup of milk to hot but not boiling. Pour into the dry cocoa mixture, whisking continuously. When finished, drizzle the second tablespoon of caramel over the top & sprinkle on the sea salt. 

ENJOY!
<3 Lishie


Friday, September 9, 2011

Mini Cinnamon~Walnut Pinwheels

These are great minis to make & take... the prep & cooking are pretty much 20-25 minutes start to finish. How? Well I've spoken of my cinnamon obsession before... Well, I had another tin of that wonderful Pillsbury Crescent dough & went to work (easy~peasy labor, really). 


All you need for these Mini Cinnamon~Walnut Pinwheels
is:

  • 3 TBSp Sugar
  • 1/4 tsp Cinnamon
  • 1/4 cup crushed Walnuts
  • canister of Crescent Rolls (pop!)

Pre-heat oven to 375 degrees. Spray or line a baking sheet with parchment paper, set aside. 


Combine the first 3 items together in a small bowl.


Pop open the crescent dough & roll it out. Pull it apart into 4 rectangles. On each rectangle, spread the cinnamon mixture completely over the top. Take 1 rectangle & carefully roll it up, tucking in any sugar/nuts trying to escape (can't have that, can we?!)... Do the same with the other 3. 


Slice the rolled dough into 4 pieces each rectangle. You will get 16 rolled pieces total. Lay them on the baking sheet. Bake for 12-15 minutes, until the pinwheels are browned on the edges but not burnt. 


ENJOY!


<3 Lishie
*Lishie Tip: Top them with icing or cream cheese frosting to make the pinwheels even better!

Thursday, September 8, 2011

Back to School Cake

These began as a snack brownie recipe off the Hershey web-site but became more of a cakey, yummy creation after I added caramel & salted the batter. I think this is my new favorite quick chocolate cake from scratch. And quick is what I needed this week. It's the beginning of the school year & I work for a prestigious, private University in New York City. We call these early days "RUSH". All of the students cram into the empty spaces of summer & come back or begin in full throttle! My days are fuller & longer & I feel the coolness of autumn in the air. Perfect time to bake a snack & perfect time to try a new, fast recipe.

Cheers to new beginnings :)!
Salted Caramel Chocolate Cake
Adapted from Hershey
  • 1/2 cup butter @ room temperature
  • 1 cup sugar
  • 1-1/2 cups Chocolate Syrup
  • 1/4-1/2 cup Caramel sauce *I used already made 
  • eggs
  • 1-1/4 cups a-p Flour
  • 1 cup Semi-Sweet Chocolate Chips
  • 1 tsp course Sea Salt
  1. Pre-heat oven to 350°F. Grease 13x9x2-inch baking pan.
  2. Beat butter and sugar in large bowl. Add syrup & sauce, eggs & flour; beat well. Stir in chocolate chips. Pour batter into prepared pan. Sprinkle the sea salt on top.
  3. Bake 30 to 35 minutes or until cake begins to pull away from sides of pan. Cool completely before cutting.
  4. ENJOY! 

    <3 Lishie