Monday, February 28, 2011

Strip House Potatoes Romanoff on the side...

Yummy, cheesy, potato-y goodness!
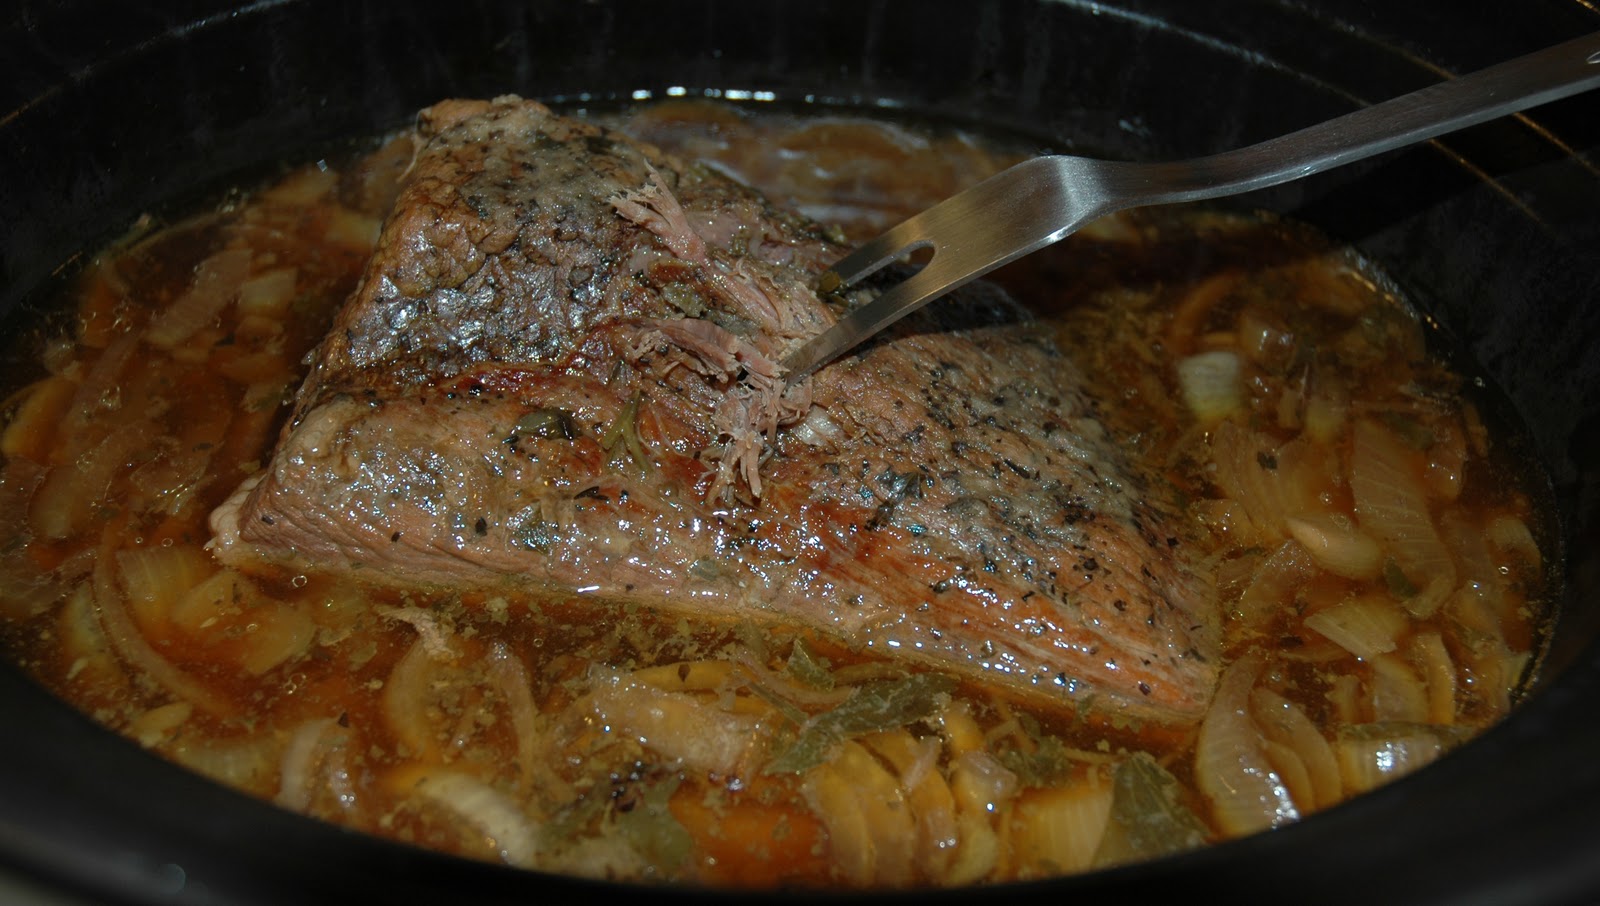
So since I was making French Onion Beef Sandwiches Au Jus, what to make on the side? I saw that Williams-Sonoma posted a recipe for New York City's Strip House Potatoes Romanoff & thought ohhhhh how wonderful! These potatoes are delicious at the steak house... Let's see if I can make them! And they came out pretty, pretty close!!! And I LOVE the method of baking the potatoes, then refrigerating them overnight. I am going to borrow what I learned & use the same technique next time I make my potato pancakes!


Some Changes: 
I made it a little, teeny, tiny bit "healthier"... my changes in parenthesis:

  • 3 large russet potatoes, about 2 lb. total, unpeeled and scrubbed  
  • 3/4 cup minced shallots  (I used 3 large shallots, which I grated on the small side of the grater)
  • 2 1/2 cups grated white cheddar cheese (I used 1 & 1/2 cups)
  • 2 tsp. kosher salt 
  • 1/4 tsp. freshly ground white pepper 
  • 1 1/2 cups sour cream (I used LESS than a cup!) 
Strip House Potatoes Romanoff
As a side to complement French Onion Beef Au Jus Sandwiches
Preheat an oven to 425ºF.

Wrap each potato in aluminum foil and pierce several times with a fork. Place the potatoes directly on the oven rack and bake until tender, about 1 hour. Remove the foil and let the potatoes cool to room temperature. Place the potatoes on a plate, wrap with plastic wrap and refrigerate overnight.


The next day, preheat the oven to 350ºF.


Using the large holes of a box grater, grate the potatoes, including the skins. Transfer to a bowl and sprinkle the shallots, 1 3/4 cups of the cheese, the salt and white pepper on top. Using your hands, gently toss the mixture together to combine, then fold in the sour cream in 2 additions.


Transfer the potato mixture to a 1 1/2-quart gratin dish; do not compress. Sprinkle the remaining 3/4 cup cheese on top. Bake until the potatoes are hot and the cheese is golden brown, about 30 minutes. Serves 6.


Recipe courtesy of Strip House.


Sandwiches! French Onion Roast Beef Au Jus (Slow-Cooker)

Oh this was really, really delicious... The house was enveloped in the simmering scent from early on. When I came home from work, the aroma was intoxicating. Make this!!! It is truly a treat, especially after a hard day. It is so good!!!!!
Serve with Potatoes Romanoff on the side!

So how to make it? Au Jus simply means “in it’s own juice” the jus part is juice. Simple enough but most recipes call for adding pre-made packets, etc. which I try really hard not to use. Why not? They are packed with sodium & words I cannot pronounce disguised as preservatives. I had to figure out how to make this fresh since I love to use fresh ingredients. That being said, I took a tiny shortcut & used a little Lipton Soup powder. Please forgive me?!

French Onion Roast Beef Au Jus (Slow-Cooker)
(French Dipping Sandwiches)


  • 1 2.5 lb. beef roast (I used bottom round)
  • salt and pepper
  • 2 Tbsp. olive oil
  • 2 cloves garlic, minced
  • 1-2 tsp oregano
  • 2 medium onions, sliced
  • 1 TBSp fresh parsley
  • 2 TBSp- of the “powder only” from a 1-ounce package dry onion soup mix
  • 2 c. water
  • 32 oz. beef broth
  • 6 large buns OR French crusty bread
  • Your favorite cheese (ours- either provolone, mozzarella or cheddar) 


Spice up the entire roast with salt & pepper. Sear the meat on all sides in a dutch oven or saute pan (I used my crock-pot since it's stove-top friendly). Place the meat in the slow-cooker & brush it with the garlic & oregano. Add the onion slices, parsley, soup powder, water & broth.

Set on LOW for 8-10 hours (I cooked mine for 9 hours- perfection). Shred the meat into it's own juices. Serve on crusty French bread rolls BUT dip the bread into the "jus" FIRST! Top with cheese. (We had it with sharp, white Cheddar because the side had the same cheese.) Serve with a little bowl of the "jus" along-side. DeLish!!!

The roast after simmering 9 hours
Shredded
"jus"
I shared some with my Mother-in-Law & I will be bringing in some for lunch too, plenty leftover.

Saturday, February 26, 2011

Smoothie Time!

Well, just when isn't it smoothie time?! I love smoothies for Gabriel, my toddler, as much as I love them myself. They are great snacks & very filling! Plus they are super healthy with fresh fruit & ingredients. And did I mention oh so versatile?!? You can use any combination of fruit (but keep in mind that a banana as a "base" provides for a good, smooth texture). You can also use any kind of milk- from skim to whole, almond, or soy or even frozen yogurt or ice cream! (YUM)... And get creative with fresh herbs, etc... And to change the texture or make it colder, slushier, just add ice!

If you have a picky tot, make a healthy smoothie &, in a pinch, sub. as a meal. If you pack it with fruit & calcium, your little one is set to go!

This was Gabriel's "choice" this morning:

Banana & Pear Smoothie
1 banana, sliced
1 pear, peeled & sliced
3/4 cup plain (or vanilla) yogurt
1 cup milk (I use whole, organic)
1/4 tsp Vanilla extract (omit if using vanilla yogurt)

Place all of the ingredients in the blender & puree until smooth.


Mama's choice*:
Banana-Ginger Smoothie

1 banana, sliced
3/4 cup plain (or vanilla) yogurt
1/4 tsp Vanilla extract (omit if using vanilla yogurt)
1 TBSp Honey
1 tsp freshly grated Ginger


Place all of the ingredients in the blender & puree until smooth. 
Enjoy!

*Lishie Tip: The banana/ginger combo is a natural antacid & digestion helper.


Friday, February 25, 2011

Banana Bread with Chocolate Chips (Quick Bread)


So tonight was pizza takeaway night but the hubby actually requested banana bread WITH chocolate chips. I was going to make banana yogurt cake but since I've been baking for everyone else, I said yes to the quick bread :)

One of my first cookbooks was Better Homes & Gardens (America's #1 Cookbook since 1930) So I made their recipe for Banana Bread. For the oil OR butter choice, I used 1/4 cup of canola oil & swapped the quarter cup of nuts for 1/4 cup chocolate chips instead. (& you can see from my pictures, I opted out of the Streusel-Nut Topping.) With my Pyrex Loaf Dish (8.5x3.5), it took 55 minutes.

My hubby was watching as I mixed & prepped everything. He exclaimed, "Wow, a lot of work goes into that!" Yes, baking from scratch is a bit intensive but I so enjoy it & he benefits from the end product!

A nice, yummy Friday night treat that my toddler will also love:


Thursday, February 24, 2011

The "course before dessert" (Mushroom Side with a Vinaigrette)

I'm use to eating salad as an appetizer but have slightly revised this course of meal since meeting my husband & the DeMaria clan. They eat salad LAST or "Il contorno" (meaning side dish or salad) before dessert.

Tonight I made Balsamic Steak with Ridicchio (this is a keeper & will recur in our home) & il contorni di funghi which sounds so good in Italian but is simply, a Mushroom Side with a Vinaigrette. My hubby's family serves it more at room temperature so it is like a salad.


Vinaigrette
1/4 cup red wine vinegar
1/2 cup extra virgin olive oil
1/4 tsp garlic powder
1/4 tsp oregano or fresh parsley

Whisk all ingredients together. Pour over salad or side.

Hubby's family like this on sliced mushrooms or on fresh green beans.

Elmo & Cookie Monster Pull-apart Mini Lemon Cupcakes

I made these last year for my now toddler's 1 year birthday- 4/17/10- to share with his school friends. And today, 2/24/11 is also Gordon, on Sesame Street's birthday- Happy Birthday, Gordon!!!

Cookie Monster was teething on a biscuit. The cupcakes, while not perfect since "I" decorated them, were definitely delish with the lemon flavor & a hit with the little ones! I made them mini pull-aparts for mini hands. Used a regular frosting & red, blue & to Make Black: Mix 3 parts red, 3 parts blue, and 2 parts green. Elmo= 10 mini cupcakes & Cookie Monster= 15 mini cupcakes. Elmo's nose & both their mouths are black frosting. Whomever got those cupcakes had lots of frosting. YUM!


Lemon Cupcakes

1 1/2 cup of unsalted butter
2 cups sugar
3 cup cake flour
1 tsp baking powder
1/2 tsp baking soda
1/2 tsp salt
5 large eggs
2 tsp.vanilla extract
Zest of 2 lemons
4 Tbsp freshly squeezed lemon juice
1 c. buttermilk

Preheat oven to 325. Line 2, 12-cup cupcake tins (or 2, 24 mini cupcake tins) with cupcake liners

With mixer, beat butter & sugar on medium speed until light & fluffy. Very frothy, fluffy!

While butter & sugar are mixing, sift together flour, baking powder, baking soda & salt in a separate medium bowl. Set aside. After butter & sugar are thoroughly fluffy- mix in the eggs, one at a time. Beat in vanilla, lemon zest & juice.

With mixer on low speed, alternate adding flour mixture and buttermilk, beginning & ending with the flour mixture & beating until fully incorporated.

Fill each liner nearly to the top with the batter.

Bake about 20-25 minutes or just until a toothpick inserted into the center of one of the cupcakes comes out clean. Be careful NOT to overbake! Remove from oven and cool completely on a wire rack.

Wednesday, February 23, 2011

Zucchini Bread (Quick Bread)

The other day, after I made the Zucchini Quiche I had leftover veg. ... not enough to make a meal out of but certainly enough to make a loaf of quick bread. My bread recipes make enough batter for two loaf pans but I tweaked my recipe in my head to just make one: 


I love this recipe because it's very versatile- You can add a ripe, mashed banana (right after the zucchini in the recipe), nuts, dried cranberries or chocolate chips (add the latter three at the very end of the recipe). Try this bread with your children- Gabriel loves zucchini but I have a feeling even if your child turns his little nose at veggies, the cinnamony-goodness of this bread will win him over! YUM.


Zucchini Bread 
1 egg + 1 egg white
1/2 cup canola oil
3/4 cup sugar
1 cup grated zucchini
1 tsp vanilla
1 & 1/2 cups all-purpose flour
1 & 1/2 tsp cinnamon
a pinch of nutmeg
1/2 tsp baking soda
1/4 tsp baking powder
1/2 tsp salt

Preheat oven to 350°F.

Grease & flour one Loaf pan (I love to use a glass dish).


Beat together eggs... mix in the oil & sugar & slowly add the zucchini, then the vanilla.


In a separate bowl, combine flour, cinnamon, nutmeg, baking soda, baking powder & salt.


Add dry flour mixture slowly into the wet egg mixture. Pour the batter into the prepared loaf dish.


Bake for 45 minutes (or until a toothpick inserted into the center comes out clean.)


Look at all those bits of green goodness!

Tuesday, February 22, 2011

S'More, please!

This is a recipe I created in high school, in Florida, that came out of "need"... The need for a portable & easy beach snack that did not need the campfire (nor refrigeration) but had the same feel. S'Mores evoke so many good memories & these are really delish (if I do say so myself). All this Girl Scout cookie talk right now made me think of these... & they are good any time but especially for a summer bar-b-que (Can y'all tell what I am daydreaming about?)

Lishie's S’Mores Bars

    • 1 & 1/2 sticks Butter, @ room temperature
    • 2/3 cup sugar
    • 1 egg
    • 1 tsp vanilla
    • 3 cups crushed (food processor) graham crackers 
    • 1/2 cup all purpose flour
    • 1/2 tsp salt
    • 2 cups chocolate chips*
    • 3 1/2 cups mini marshmallows
    Pre-heat oven to 350°, grease or spray 13x9x2-inch baking pan (or two, 8x8 brownie pans). 

    Beat butter and sugar with electric mixer on medium speed until light and fluffy. Beat in egg and vanilla. In a separate bowl, mix together crushed graham crackers, flour, and salt. Stir the graham cracker mixture into the butter/sugar/egg/vanilla mixture. Should become one, big crumbly clump.

    Press about 1/2 cup or more, if needed, of the graham cracker mix over the bottom of the greased 13x9x2-inch baking pan. Sprinkle half (1 cup) of the chocolate chips on top. Sprinkle 3 cups of the mini marshmallows on top. Crumble, by hand, the rest of the graham cracker mix on top. Sprinkle last 1/2 cup of the mini marshmallows on top and finally, sprinkle the rest (1 cup) of the chocolate chips on top.

    Bake for 25-30 minutes or until brown.
    * I use ghiradelli brand, semi-sweet. YUM.
    Chewy, marshmallow goodness! 

    Monday, February 21, 2011

    Pistachio Cupcakes for Marie

    My NJ/NY commute is made so much better by some really great people on the bus. One friend, Marie is a sweet heart, divvying out Friday hugs & always being so sweet. She's a Valentine's Day baby & I wanted to bake her something yummy... she requested: Pistachio Cupcakes. ONLY for Marie (i. e.- someone special) would I shell over half a pound of nuts!!!) I used the recipe linked because I bake from scratch (didn't want to use any of the many pistachio gelatin mix inclusive recipes) & I omitted the raspberries:


    They made my home smell delish! I hope marie loves them!!!

    Sunday, February 20, 2011

    A "meaty" vegetarian feast- Portobello Parmesan

    Looking for a hearty vegetarian dinner? I'd love to suggest Portobello Parmesan. It's filling & even a crowd pleaser for the meat-lovers in your life! It was the perfect meal for my veggie sister Perrie & for my hubby... no leftovers! I've made this many times for my hubby alone:

    Portobello Parmesan
    • 8 small OR 4 large portobello mushrooms (damp wiped, stems removed)
    • olive oil
    • salt & pepper
    • 3-4 cups Marinara Sauce
    • 1/2 cup mozzarella, shredded
    • 1/4 cup shredded parmesan (as topper)
    Pre-heat oven to 400 degrees F.

    Brush the portobello mushroom caps with the olive oil on both sides. Salt & pepper each cap. Grill each side about 5 minutes on medium-high.

    In an oiled (I use olive oil spray) baking dish or dishes (I used 2, 9" X 13" glass pyrex dishes for 8 caps), spread 1 cup marinara sauce. Place the mushroom caps, bottom facing up, on the sauce. ladle more sauce into each cap. Place shredded mozzarella onto each cap, then top with shredded parmesan cheese.

    Bake for 15-20 minutes or until cheese is melted, bubbling & browned.


    AND, my sister is taking home the sauce from the baking dishes to use as a mushroom sauce on pasta. Win, win! Good thing, since there are no leftover ports!

    Lemon & Garlic Tilapia with Zucchini & Pepper "en papillote"

    So, as I've been blogging about (because nothing makes me happier), my sister is visiting overnight. She is a vegetarian & I decided to prepare her a very "meaty" veggie dinner that she & my hubby love. The catch? I, the cook, do not like it so I made this for me. Funny, my sister said it looked delish :) It was!  Simply defined, "en papillote" is the French phrase for "in parchment". 


    Lemon & Garlic Tilapia with Zucchini & Pepper "en papillote"
    2 tilapia fillets
    1/4 small onion, thinly sliced
    1 clove garlic, thinly sliced1 small zucchini, julienned
    1 small red bell pepper, julienned2 lemons- I juiced, 1 sliced 
    Fresh Parsley
    Extra virgin olive oil
    Salt & pepper

    Preheat oven to 400 degrees F.

    For each fillet, cut a sheet of parchment paper (you can also use aluminum foil) twice the size of the fish fillet. 

    Lay one fish fillet in the middle of the parchment paper. Layer the 1/2 the onion slices, 1/2 the garlic slices, 1/2 of the zucchini, 1/2 of the red bell pepper, & 1-2 lemon slices on top of the fillet.  Juice 1/2 lemon & drizzle a little extra virgin olive oil & salt & pepper over the fillet & veg. 


    For the "FOLD"- Take one side of the parchment paper LENGTH-WISE & half it (fold it) over the other side. WIDTH-WISE- Fold in the sides to create a little "package". 


    Bake "en papillote" on a baking sheet for 30 minutes. Remove the fish from the oven. Remove or serve in the packet but be careful to avoid the steam when opening.


    "en papillote"


    Lunch Recipe Swap... Vegetarian-style

    Another great recipe swap! So, a group of us "Nestie" cooking gals exchanged recipes under the category, "lunch" & I got Zucchini Quiche & Tomato Soup... At the EXACT same time my vegetarian sister was coming to visit- A swap made in heaven. So not only could I try this lunch recipe out myself but I had a great taste tester to boot, Perrie... the VERDICT? De-Lish!!! My sister has had seconds & thirds for DESSERT... & is taking home the rest! Ha ha! Thank you so much Jamie Herr! 


    Jamie’s Lunch Recipe Swap (Joeyzlovieg)


    Zucchini Quiche 
    (Jamie: Cannot remember where I originally got this years ago)

    3-4 cups of zucchini, shredded (I used 3 zucchini)
    1 medium onion, chopped (I used 1/2 sweet Peruvian onion)
    1 cup of Bisquick 
    (I used sub.- see below)
    4 large eggs
    1/2 cup of vegetable oil 
    (I used canola)
    1/2 cup of Parmesan or Romano cheese
    (I used fresh grated parmesan)
    1/2 teaspoon of marjoram
    (I subbed oregano which is nearly the same thing)
    1 teaspoon of parsley
    (I used fresh parsley)
    1/4 teaspoon of salt
    1/2 teaspoon of pepper

    Mix all ingredients together. Pour into buttered 10-inch pie plate. Bake 35-40 minutes at 350ºF. until golden brown. Serves 6. ****the original recipe states for 35-40 minutes, but I always have to cook it for at least an hour…


    Bisquick SUB:


    1 cup flour/1 & 1/2 tsp baking powder/ 1/4 tsp salt/1 TBsp Crisco
    Mix dry ingredients together, then using a pastry knife cut the Crisco into the mix. Makes 1 cup Bisquick equivalent.


    The Neely's Tomato Soup
    I tweaked the recipe & used canned tomato (2, 29 oz. cans, 1, 15 oz. can), vegetable stock (instead of chicken) & omitted the cayenne. In replace of the basil, I used fresh parsley.


    Saturday, February 19, 2011

    Cooking for a beloved Vegetarian

    Cavatelli & Broccolini

    So my sister Perrie, "Gabriel's aunt", the teeny-tiny, GOOD eater BUT also a vegetarian, is finally coming to visit! What does that mean? Sister Lishie is in the kitchen preparing all of little sis' favorite foods... Something for dinner (sorry- tomorrow's blog- Hint? It's veggie as well ;) This is IT ) & most importantly, to "takeaway" home with her. Yes, I am cooking & packing it all up. She loves Kasha - CHECK! packed... & I also made Cavatelli & Broccolini, yes, broccolini. Broccolini is a natural hybrid between broccoli & gai-lan (Chinese Kale) but looks like broccoli rabe. You can definitely go with the classic broccoli though! I thought I'd change it up when I saw these gorgeous, unique greens at the supermarket.

    Cavatelli & Broccolini
    Cavatelli & Broccolini - CHECK! packed
     
    2 heads of brocolini
    1 lb. cavatelli
    1/2 cup olive oil
    4 cloves garlic, sliced
    *red pepper flakes (optional)
    fresh, grated parmesan (for topping)

    When water boils, add in pasta & broccolini... cook to cavatelli package instructions, then drain.

    While the pasta & broccolini are cooking, heat the olive oil on medium heat, add the garlic slices & cook until they are golden. Be VERY careful not to burn the garlic! Add in the red pepper flakes if using. Add the pasta & broccolini to the garlic oil sauce & toss together. Top with grated parmesan cheese.

    *Instead of red pepper flakes I chopped a slice of red bell pepper very small to add a little color to the dish without the kick.

    All the while making & prepping these three dishes, I fed Gabriel & cooked this hubby pleaser for dinner.
    Perrie's "Takeaway"

    I cannot wait to see my little sister, can you tell? Hope my dishes make her happy. Next up? Dessert for Perrie as well as a birthday treat for another special person! Stay-tuned :)


    Thursday, February 17, 2011

    Short-cut Fish 'n Chips...

    Ok, pass the tartar sauce, please! Sometimes even people who love to cook (like me) take shortcuts... when they are worn thin, tired & just need a break... So tonight was "oven baked" haddock (by way of the Gorton's fishermen, trust them!) Don't knock it- it's very tasty!) with tartar sauce (mayonnaise, diced pickle & lemon juice & S & P). I also made these Old Bay Steak Fries tonight for hubby since he LOVES (I mean loves) Old Bay Seasoning. Ummmm, but, not-so-much on his fries apparently. They were a good idea in theory. Ha! Well, you can only know if you try ;) 

    they "look" yummy!
     I can't speak for their taste since I ate these with Gabriel:
    Smiley, oven baked goodness :) :) :)

    Wednesday, February 16, 2011

    Ribollita Soup for my Soul

    So I have been suffering tummy pains the last few days & needed some comfort. I decided to make a soup that my hubby would enjoy and I could "pick & choose" what to eat out of it, depending on how I felt. Oh yes, & it needed to be simple. Ease is key when one is doubled over in pain. I went the slow-cooker method on this one but it can be cooked in a dutch oven or stock-pot via the same method.

    Ribbolito means "re-cooked" in Italian & this Tuscan bean soup is yummy slow-cooked... & even yummier as leftovers (just add more water or stock to "freshen").


    Crock-pot Ribollita
    5 medium carrots, peeled & chopped
    3 celery stalks, chopped
    4 oz. pancetta, diced
    1 cup dried cannellini beans, rinsed
    1 bunch of Kale, cleaned- ribs, stems & rough leaves removed
    1/4 cup tomato paste
    1/2 freshly grated parmesan cheese + the rind
    salt & pepper
    4 cups chicken stock (or veggie)
    4 slices crusty bread
    1/4 cup chopped fresh parsley
    extra virgin olive oil
    2 cloves garlic, sliced

    In the pot, combine the carrots, celery, pancetta, beans, kale, tomato paste, parmesan rind, salt, pepper, chicken stock & 3 cups of water. Cook on low, 8 hours. Before serving, stir the soup well, then add parsley, grated parmesan cheese & salt & pepper to taste.

    Place the slices of bread on a baking sheet, place garlic slices on the bread, then drizzle with olive oil- Bake until golden brown. Place a slice of bread in each bowl, then ladle soup over it. Top with a drizzle of olive oil & fresh, grated parmesan cheese.

    Monday, February 14, 2011

    What says "I love you" more than a healthy, delish meal?

    So today is Valentine's Day... such a beautiful day thought-wise. I am a lucky girl- I got to spend the day with the two loves of my life- my hubby & baby boy, Gabriel. Oh & I got my favorite-  Fran's Grey Sea Salt Chocolates. Having an illness that effects the ways in which I eat, it's hard to go out on a "normal" night let alone on a night when restaurants create pre-fixed meals & won't budge (Yes, this happens to me all of the time.) Well the last few days I have not felt well & today was bad so I knew I'd be cooking! Which is fine with me- when you love to cook & love to be home, EVERY night is SPECIAL.

    Tonight I made Chicken Souvlaki with Tzatziki Sauce & I put my own spin on it. I'm sure how I make it is not "traditional" & I am sorry but it was DELISH! It is so easy & fast to make. I also prepared this cous cous on the side.

    Chicken Souvlaki with Tzatziki Sauce
    Pocket-FULL of goodness! 


    Chicken:

    • 1 lb. boneless chicken breasts
    • 1/4 cup olive oil
    • 1 TBsp fresh dill
    • 1 tsp dried oregano


    Tzatziki Sauce:

    • 1/4 cup Greek Yogurt
    • 1 TBsp fresh dill
    • 1/4 cup diced cucumber (peeled & seeded)
    • 1 TBsp lemon juice
    • 1 TBsp olive oil
    • 1/4 tsp garlic
    • Bread & Toppings:
    • pitas (I get white but will work with whole wheat)* 
    • Lettuce
    • tomato
    • cucumber


    ChickenPreheat oven to 400 degrees.  In a small bowl, mix the olive oil, dill & oregano. Arrange the boneless chicken on a foil lined baking sheet. Brush the olive oil & herb mixture onto the chicken. Bake for 20 minutes or until the chicken is cooked. Dice the chicken.  Tzatziki Sauce:
    Mix all of the ingredients in a small bowl. Serve the  sauce topped on the chicken in the pita.

    *Lishie tip- Place the entire pita flat on a bread board & slice a 1/4 off of the top to create a pocket. Puffer open the pita pocket & take the sliced piece & carefully stuff it into the bottom of the pita. This helps create a thicker bottom so when the weight of the food & when the sauce drips to the bottom, there's extra bread to absorb. Helps keep the pita intact longer!

    Saturday, February 12, 2011

    Crock-Pot Peppered Steak, Made, as always, with LOVE

    Today was my local Moms Group's Valentines Party & it was so much fun! Everything was potluck & wow, so delicious!!! I decided, after checking on what everyone was bringing, to make peppered steak. When you hear "Crock-Pot", it generally brings to mind the words "simple" & "unattended". BUT when you are making food for 30+ people (not counting the 21 kids) it's never easy... I have tweaked a recipe for this a couple of times & I finally have it just right.

    For the party, I DOUBLED the amounts below in my 6 Quart Crock-Pot:

    Crock-Pot Peppered Steak

    2 lbs. beef sirloin (I use Angus)
    1 tsp garlic powder
    1-2 TBsp canola oil
    1/4 cup hot beef stock 
    1 TBsp corn starch
    1 large onion, sliced
    3-4 large bell peppers, sliced (I use a mix of green & red/yellow/orange)
    1, 15 oz. can tomato sauce
    2 TBsp soy sauce (I use reduced sodium)
    1 TBsp A1 ;) My secret weapon! HA HA!
    1 tsp sugar
    1 tsp of both, S & P
    **1/4 cup beef stock 


    Let beef rest out of the refrigerator to get the chill off. Season with the garlic powder... (Either in your crockpot, if you have a stovetop dutch C-P) OR in a skillet, heat the canola oil on medium-high... Sear (brown quickly) the whole Sirloin on both sides, then transfer it to the crock-pot.
    Heat the beef stock (I microwave the stock in my Pyrex measuring glass)... then dissolve the corn starch.  Pour it over the meat. Add the tomato sauce, soy sauce, A1, sugar, onion & the S & P. 


    *Here's where you are forced to make a decision... convenience & very soft peppers OR a little extra work with the outcome of peppers with some bite still to them? IF you choose convenience, ADD THE BELL PEPPERS HERE... Cook on LOW for 6-8 hours. When it's done, use tongs to "break" up the sirloin into bite-sized pieces.


    IF you choose the "extra work" option... Place the cover on & cook on LOW for 8 hours... At 6 hours, use tongs to "break" up the sirloin into bite-sized pieces... Ladle the steak pieces out, leaving the liquid, into a bowl, refrigerate. Add the bell peppers into the crock-pot & **1/4 cup of beef stock... Cook on LOW for 1 & 1/2- 2 hours. At last half hour/end of pepper cook time, add in the meat & mix together... If your Crock-pot has a warming option, you are good to go!

    Since I was serving to others, not just our little family who loves soft peppers, I decided on the extra work & "bite" option. I definitely think it paid off. The meat was so unbelievably tender, the sauce, delicious, & the peppers, in tact with a bit of a crunch. I *think* it was a crowd pleaser since I came home with an empty crock-pot!

    [The "funny" for this post- since I began this @ 10pm  & the steak simmered all night... then I added the peppers early this morning (it was a lunch-time party)... my hubby said it felt like he had eaten it ALL night ;) HA HA! But, of course, he still had some!]


    Thursday, February 10, 2011

    (Quick) Marinara (Sawse)!

    I never buy sauce in a jar, I always make it because I've found that my quick marinara sauce recipe is simple & tastes so good, why use store bought? I use the following recipe as sauce for pastas, raviloi or for dinners like baked ziti, stuffed shells, mushroom or eggplant parmigiana as well as a "dip" for calzones & breadsticks... & for homemade pizza:

    Quick Marinara Sauce

    • 1 TBsp olive oil
    • 1 small onion, chopped & diced very small
    • 2 cloves garlic, minced
    • 1 TBsp tomato paste
    • herbs (whatever's fresh on hand or dried oregano & basil)
    • (*red pepper flakes, if desired)
    • 2 large cans tomato sauce (or whole tomatoes -blend these)
    • 1 can diced tomatoes or freshly chopped, diced tomatoes
    • S & P
    • 1 TBsp sugar
    • 1 bay leaf (take out at end)
    • Fresh Basil
    • Fresh Parsley

    On medium-low, heat the olive oil in the sauce pan. Sweat the onion (saute it until it becomes clear) then add the garlic for one minute. Stir in the tomato paste & herbs & cook for another minute.  Pour in the tomato sauce & diced tomatoes. Sprinkle in S&P to taste, then add sugar, stir. Place in the bay leaf. Simmer for an hour or longer (the longer it simmers, the thicker it gets, & the more the flavors blend together). At the end of the simmering, right before you turn off the stove, pull out the bay leaf with tongs, then add in fresh basil . Top with some fresh, chopped parsley.

    Wednesday, February 9, 2011

    Just the Basics! & Parmesan & Basil Crackers


    I have mentioned my 7th grade home ec cooking teacher, Mrs. Steadman before. Before Mrs. S, I "just cooked" or "just baked" in order to eat... When I arrived in her class at Lake Worth Jr. High School I learned the basics & have held onto them since. Thanks to her, I never "pack" flour into a measuring cup, I use the right spatula for scraping or for leveling & decorating... I ALWAYS bend at the knees to get eye level with the liquid measuring cup (which, I must say, I notice pretty much none of the television chefs do) because if not, the measurement is skewed. I always crack my eggs on the counter & not the side of a bowl... Room temperature butter & eggs (& sometimes milk) is best for baking unless it's for pie crusts or scones. And COLD milk & cream are best for ice cream making. When baking, add a little flour to chips & nuts to prevent them from falling like anchors to the bottom of the batter. And I know that the proper way of writing (& reading) a recipe is to list the ingredients in order of usage.

    She also taught me all of the different types of cookies & illuminated the fact that brownies are actually a bar cookie & not something unto themselves. One of the most extraordinary cookies to me, was the refrigerator cookie. These take patience, especially in the 7th grade. We prepped the dough, secured it tight in plastic wrap & popped it into the classroom refrigerator. No eating our spoils that day- we had to wait till the following day's class to cut them with the pastry scraper & bake them... We were so hungry for them (I mean, waiting TWO whole days?!), they were absolutely de-lish!

    As a nod to Mrs. Steadman's teachings, I thought I'd bake a grownup version using refrigerator method- The Barefoot Contessa's (Ina Garten) Parmesan & Thyme crackers. I subbed fresh basil for the thyme because I had a huge bunch of it from other meals this week. These have a wonderful flavor & are great with cheese, jam or fruit. If you haven't tried making fresh crackers, you should!